Selectors Family in Recoil for Statement Management — Nextjs

Welcome friends. This blog post will teach you how to use the recoil atom family to update the specific atom in recoil state management.
If you understand Hindi, 🥳 this is for you 👇
If you want to know the basics of recoil Recoil State Management
🤔Situation
When to use atom Family in recoil.
Suppose, you got a project for making a todo app. Now, you have to make a website where you can edit each todo and also create a new todo.
Firstly, you created a website that uses atoms for storing all the todos, and then you used a selector family for changing a specific todo.
Sample Source Code — https://github.com/nextdev1111/atomfamily-tutorial
Now, you can use this code in your ide.
🤕Problem with this code
There’s a major problem with this code. The problem is that if you update a single todo title, then all the components, which use the atoms will rerender.
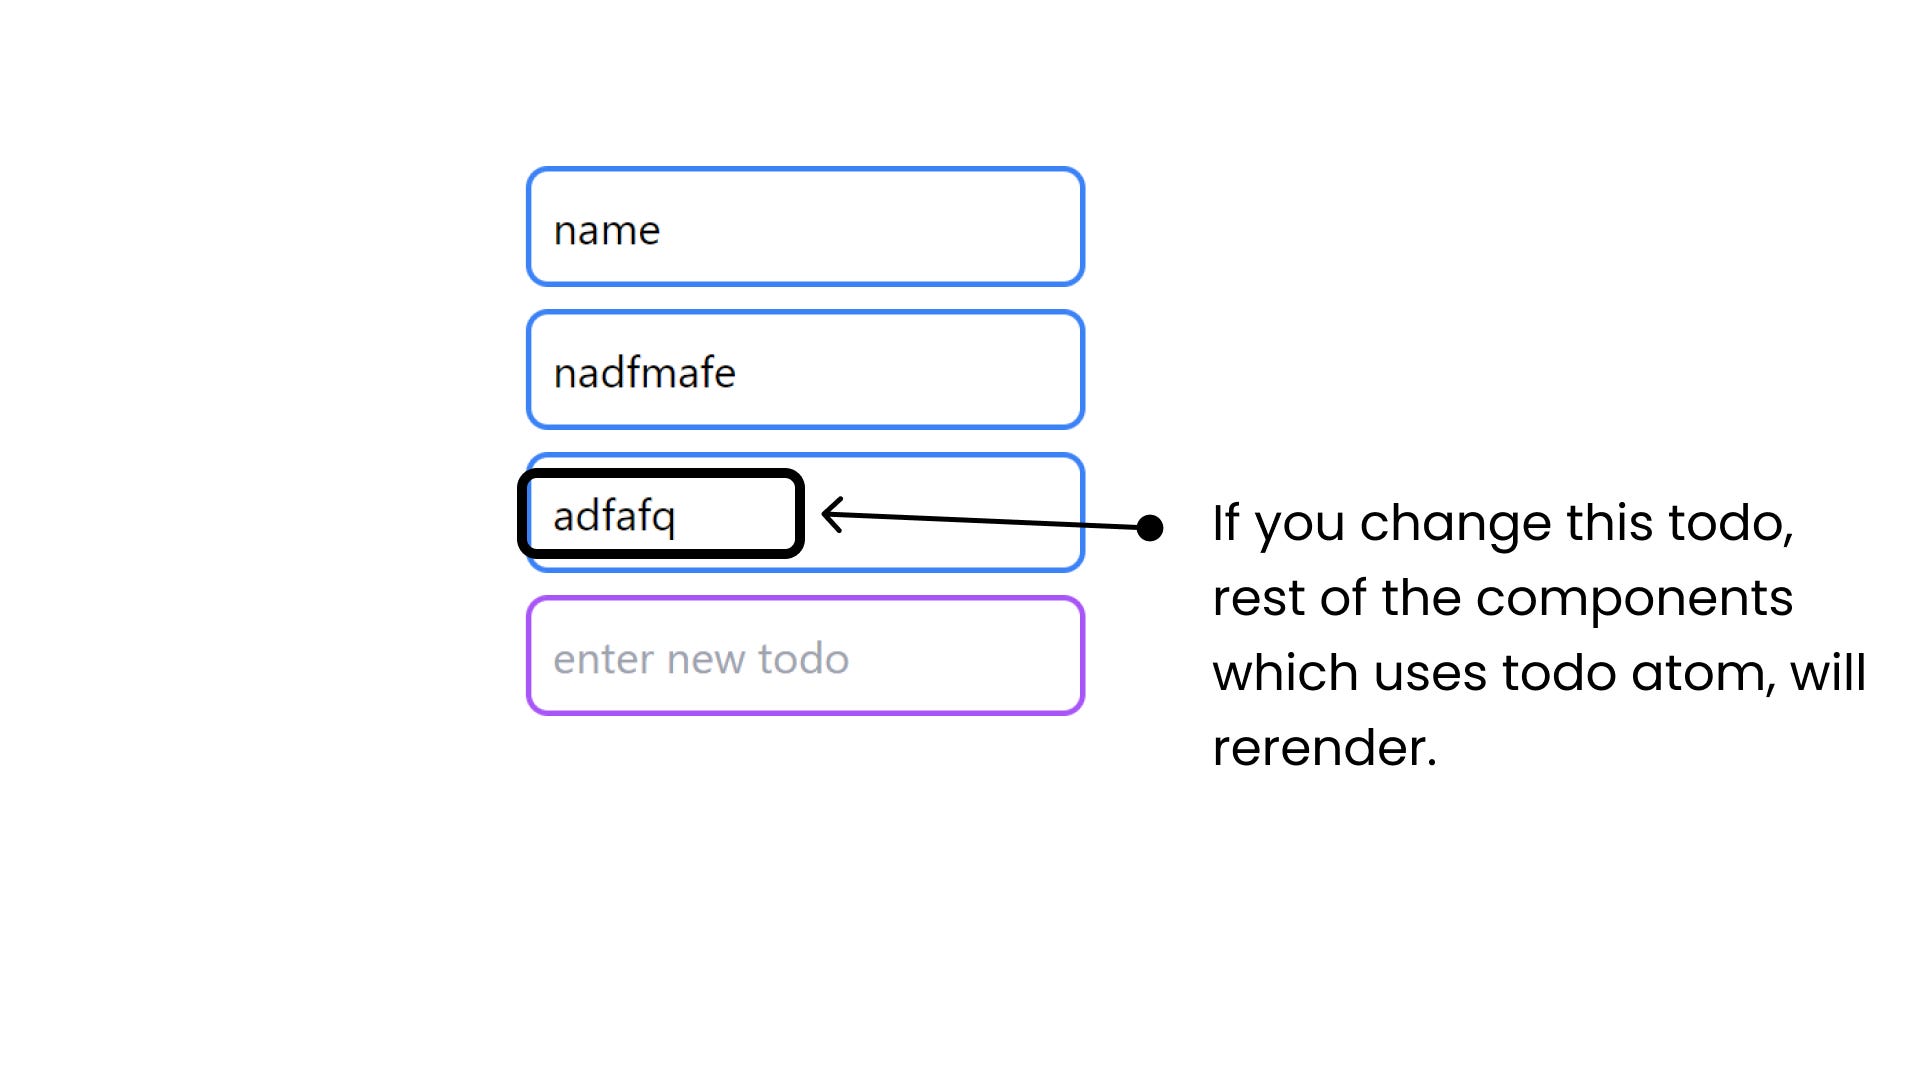
This is because, when you change one todo, you ultimately change the whole list which forces all the components to re-render and it takes a lot of power which essentially decreases performance.
😍In simple words
In simple words, the atoms family takes a param and changes a specific item but atoms don’t take a param and change the whole atom.
🤔Solution
You can use atomFamily which helps you to edit a specific todo. This is very performant in big sites.
How to use it?
Taking this website as an example, you need to follow these steps:
Step1: Remove Selectors and Add AtomFamily
First, Delete the selector's folder and their imports.
Go to atoms.ts file and change this
import { atom, atomFamily } from "recoil";

export type Todo = {
  id: number | undefined;
  title: string;
};

// this will store the ids of the todo added
export const todoIdsAtom = atom<number[]>({
  key: "todoIds",
  default: [],
});


// this will store the data of the todos
export const todoAtomFamily = atomFamily<Todo, number>({
  key: "",
  default: {
    title: "",
    id: undefined,
  },
});
Step2: Change the index file
Go to index.tsx file.
import type { NextPage } from "next";
import React from "react";
import { useRecoilCallback, useRecoilValue } from "recoil";
import { todoAtomFamily, todoIdsAtom } from "../atoms/atoms";
import Todo from "../components/Todo";

const Home: NextPage = () => {
  // this will give us the list of all the todo's ids
  const todosIds = useRecoilValue(todoIdsAtom);

  // handle submit function
  const handleSubmit = (e: React.FormEvent<HTMLFormElement>) => {
    e.preventDefault();

    const formData = new FormData(e.currentTarget);

    const title = formData.get("title");

    const nextTodoId = todosIds.length;

    insertTodo(title as string, nextTodoId);

    console.log(todosIds);

    e.currentTarget.reset();
  };

  // inserttodo callback
  const insertTodo = useRecoilCallback(
    ({ set }) =>
      (title: string, id: number) => {
        set(todoIdsAtom, [...todosIds, id]);
        // 👇 as you can see that todoAtomFamily takes a param which we have given as id
        set(todoAtomFamily(id), { id: id, title: title });
      }
  );

  return (
    <div className="flex min-h-screen flex-col items-center justify-center py-2">
      {/* Todos */}
      {todosIds.map((todo, index) => (
        <Todo key={index} id={todo as number} />
      ))}

      {/* Input Box for adding todos */}
      <div>
        <form onSubmit={handleSubmit}>
          <input
            type="text"
            name="title"
            placeholder="enter new todo"
            className="p-2 text-md border-2 border-purple-500 outline-none rounded-lg"
          />
        </form>
      </div>
    </div>
  );
};

export default Home;
Step3: Change the component — Todo
Go to todo.tsx file in the components folder.
import React from "react";
import { useRecoilState } from "recoil";
import { todoAtomFamily } from "../atoms/atoms";

function Todo({ id }: { id: number }) {
  // fetching the specific todo by it's id
  const [todo, setTodo] = useRecoilState(todoAtomFamily(id));

  return (
    <div>
      <input
        type="text"
        value={todo?.title}
        onChange={(e) => {
          setTodo({
            ...todo,
            title: e.target.value,
          });
        }}
        placeholder="todo title"
        className="p-2 text-md border-2 border-blue-500 outline-none rounded-lg mb-2"
      />
    </div>
  );
}

export default Todo;
If you want to understand more, feel free to message me at [Join the Next Dev Discord Server!] https://discord.gg/hN4Wc5VR4M


